In our previous post we looked at using Azure AD to perform the authentication for our F5 published web apps that used Kerberos. Now the strength of the F5 APM module is the SSO capabilities that allow it to authenticate users once and then they could reach any web app published by it, regardless of used authentication protocol.
F5 does this by caching your username and password in the SSO modules and from there derive the NTLM (1/2) challenge, perform basic authentication by forwarding these credentials or pushing them straight into a form of the backend webserver.
With the previously posted configuration, that username can be derived from the SAML token, but the password is not in there. So, it could only perform Kerberos Constraint Delegation. But what if you have other websites published by the F5 APM module but still want to use Azure AD?
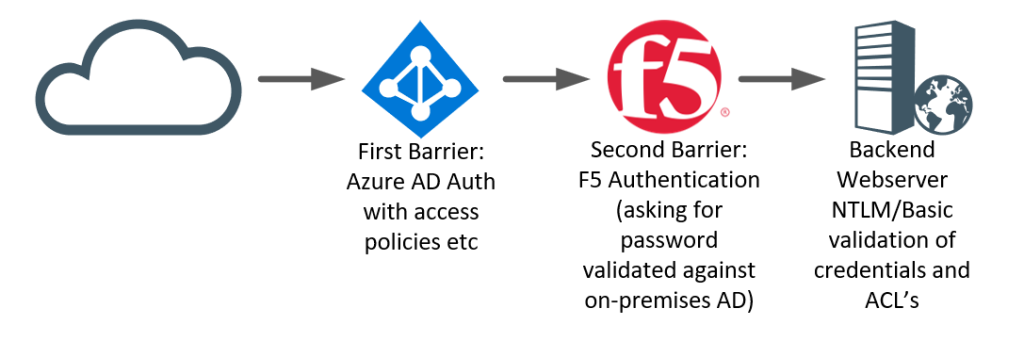
In this post, we look at using Azure AD as the first barrier to our F5 APM module, after which the user needs to provide his/her password to access backend Basic/NTLM(1/2)/Forms based websites.
There is good reasons to actually implement such a configuration. First being that by using Azure AD as the front-gate, you don’t have a password attack service wide-open. Users would reach the F5 authentication module only after fully authenticating to Azure AD (with MFA?) and if enabled with Identity Protection. Device Registration Policies and Intune policies now can apply easily to your F5 without requiring additional licenses or complex setups.
Secondly, it allows for users to perform MFA easily (in Azure AD), while still maintaining sort of an SSO. It’s not pure SSO but more of TTSSO (Two-Time-Single-Sign-On). As, once the user has provided their password to the F5 device it can now authenticate the user to any published site given it still has the password (and UPN).
Configuring ap02.forestroot.net
So, in order to achieve the above, I created a new local virtual server and published an IIS website with only basic authentication enabled.

Then in Big-IP I configured the SSO Basic module. As I’m going to re-use the UPN of the user extracted from the SAML token (used in the previous example) for my authentication, a change to Username Source is required:
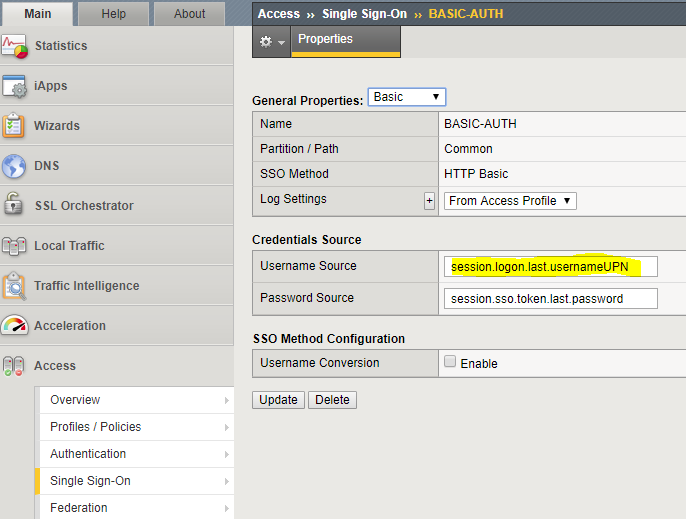
The reason for using the UPN is simple, it is way simpler to use and it allows for multi-domain usages. I could also still use the sAMAccountname, but that would only work if I also inject the domain name (either manually or through an LDAP lookup to get DOMAIN\username. Given we already have user@domain.name, that is way easier to use.
Azure AD / App Configuration
This chapter is going to be short. Do exactly the same as in our previous blogpost. Create an AAD application, download the Federation XML file, create an External IDP and SP. From the SP, download the XML file and upload it back into Azure AD. Don’t forget to link the SP to the External IDP created and done.
Access Policy
Next is the access policy. As indicated, we want to implement something like this:

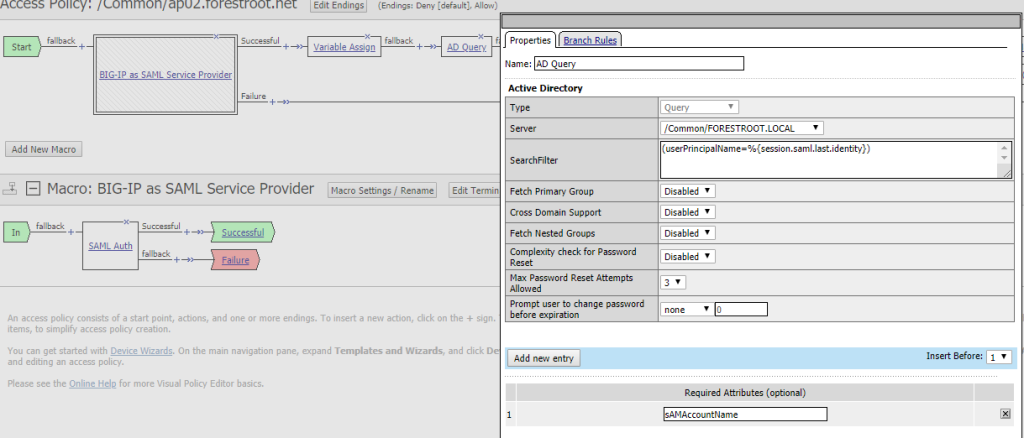
So in our access policy, we need to add a BIG-IP as SAML Service Provider (see previous blogpost) and make sure to select the ap02.forestroot.net IDP provider:

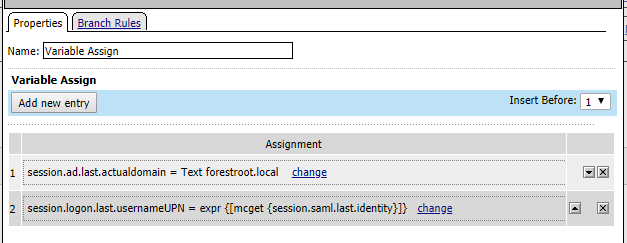
Next is the variable assignment (exactly like the previous configuration:
And the AD query (exactly like the previous configuration)
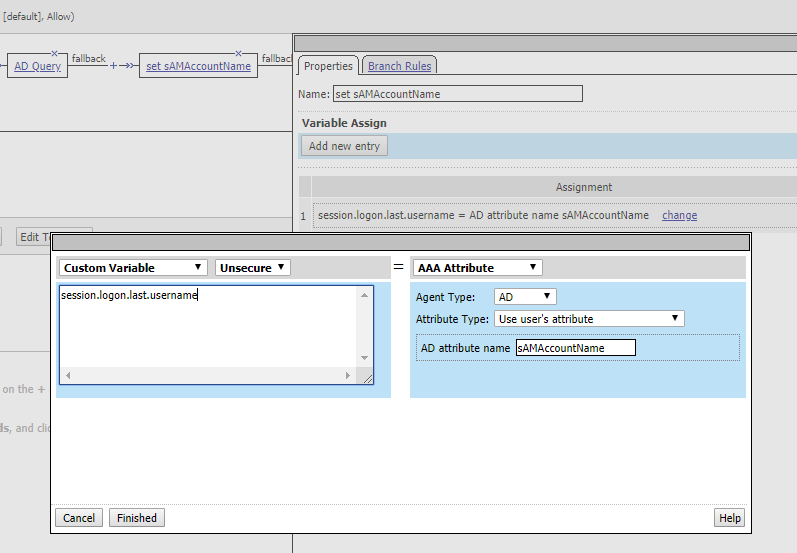
And then we set another variable. Given we now have the sAMAccountName we can set it as the session.logon.last.username. So I added another variable assignment and configured it like:
Then I added the login page. Now, there are multiple ways to configure this, but the easiest I thought I could make it for users, is to show their username (UPN) and only ask for their password. In the backend we can still do the mapping to UPN/sAMAccountName or whatever we need to do.
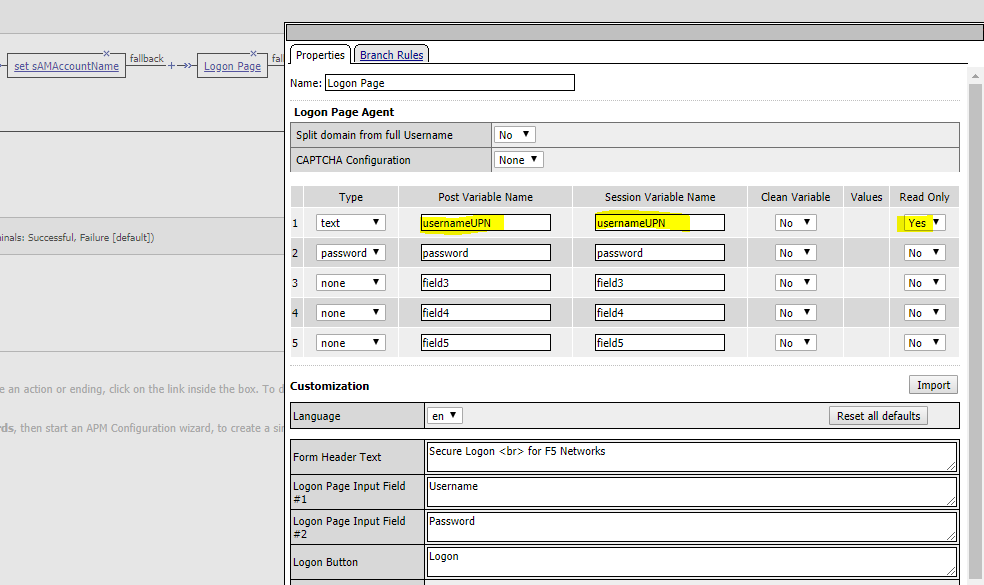
So in my login page, I changed the username to UPN and selected ReadOnly. Any other changes you want to make to the layout you can obviously.
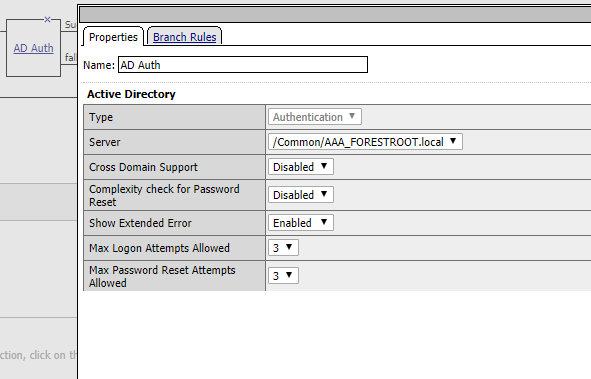
Next up is the actual AD authentication, which doesn’t really require any configuration other than setting the Server itself.
And finally the SSO Credential Mapping where I changed the values to use sAMAcountName (similar to the one in my previous blogpost.)

and that concludes the configuration.
Now you may see that I added a Message box at the end of both the successful and fallback branches. This is used for my testing. F5 knows the sign-out URL for AAD (as it’s imported with the federation XML file), and as soon as a flow hits a Deny, it will actively issue a sign-out from AAD. Which is really annoying during testing. Hence the message box so I could interrupt this.
Which makes up for the entire policy like this:

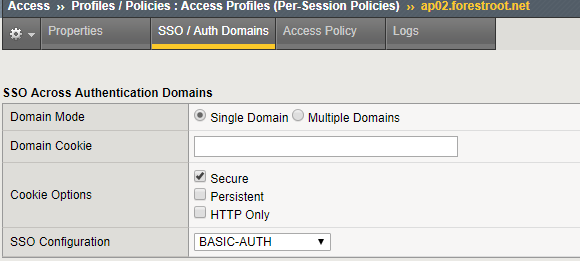
Lastly, on the Access Policy, set the SSO Domains to the created SSO object (NTLM/Basic/etc).
The experience
So form an end-user experience it now goes like this:
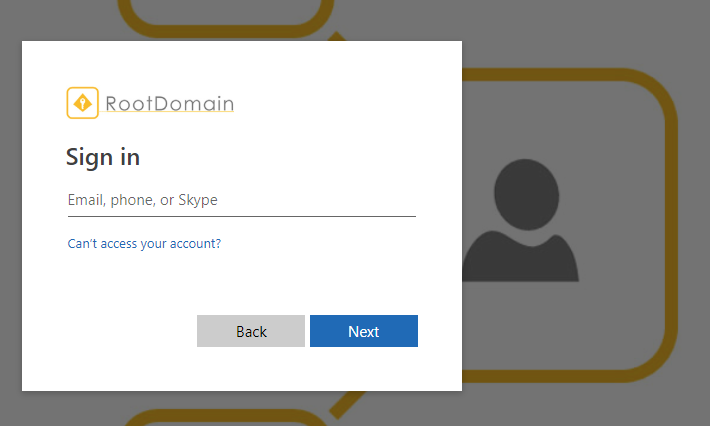
The user goes straight to the URL, or launches the web app from the myapps portal (or from within O365 or something). When going to the URL directly, the user will need to perform authentication against Azure AD – given the redirect automatically knows the tenant it needs to go to, it will redirect to your AAD immediately:
after performing authentication (in my case with MFA), the F5 APM login module will ask the user again for their password:
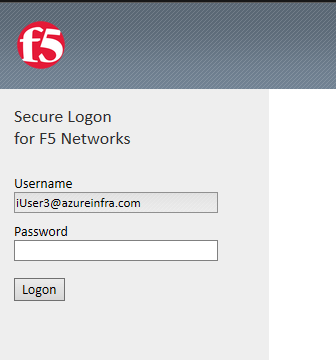
Personally, I would change the page a bit, stating the user is accessing legacy applications (encouraging the application owner to update to Kerberos or SAML/oAuth/etc (for full SSO)) and therefore their password is rrquired one more time. Note that in this case, I locked the username. This is for me a safety feature. It prevents users from changing it and performing password guess attacks for other users in the organization.
Click logon and voila!

Conclusion
I’m not a full F5 expert, and I’m sure there are many tweaks that can be made here and there. But this blog-post shows that it is possible to combine F5 BIG-IP APM authentication with Azure AD, providing many benefits over a local login only.
If you have any feedback on this post, feel free to reach out.. (but don’t expect me to be an F5 expert.. 🙂 )