It was the year 2008, and Microsoft released their first multi-touch computer called the Surface Table. Not everyone knows this device, but it is essentially a table with a beamer below it (while TFT was available at the time, there was no (or cheap) option for touch, let alone multitouch).
So, Microsoft created a table that could be put in lounges, stores and public places that allowed interactive applications to be ran and have users play games, order/create their own pizza etc.

Recently (or should I say finally!) I got myself such a device to play with, and this blogpost is for the ones that are interested in the technology behind it or are lucky enough to have one as well and want to run Windows 10 with touch on it.
First the original hardware specs:
- Core2Duo E6400
- 2Gb DDR2 memory
- 250GB HDD (sata2)
- ATI X1650 Graphics
- Custom Microsoft Camera board
- 5 infrared cameras
- Infrared light
- built-in beamer (using DVI)
- Asus USB Wireless Adapter
- Bluetooth adapter (2.0)
- Built-in speaker, microphone
- Aux out (audio), headphone out (audio)
- VGA (15 pin) and RGB out
- 4x USB ports (externally accessible), 2 USB ports internally accessible (unused)
- multi-color LED’s for the table top (controlled by Surface SMC)
Technology
So how does the Surface table (or as Microsoft renamed it later: PixelSense) works? It is best explained in the following picture:
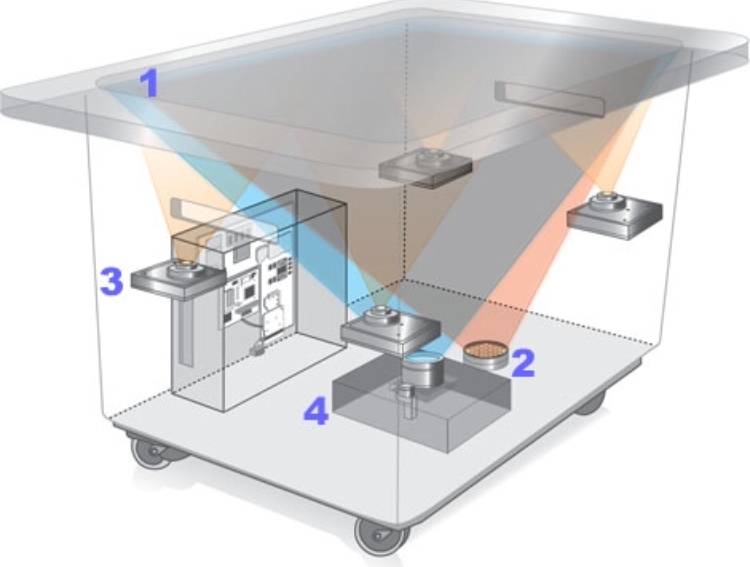
A projector (4) projects the image on a screen (1). The unit also has an infrared lamp (2) which projects infrared light onto the screen surface. Then there are 5 camera’s that pick up the infrared light that is bounced back as soon as someone puts something on (or touches) the screen surface. The image returned to the camera’s is recalculated and interpreted to see if it is a human touch or something else that is put on the table.
This allows the device not only to respond to touch, but also objects placed on it. It can (with a little help from software) for example recognize shapes etc.
My Upgrades
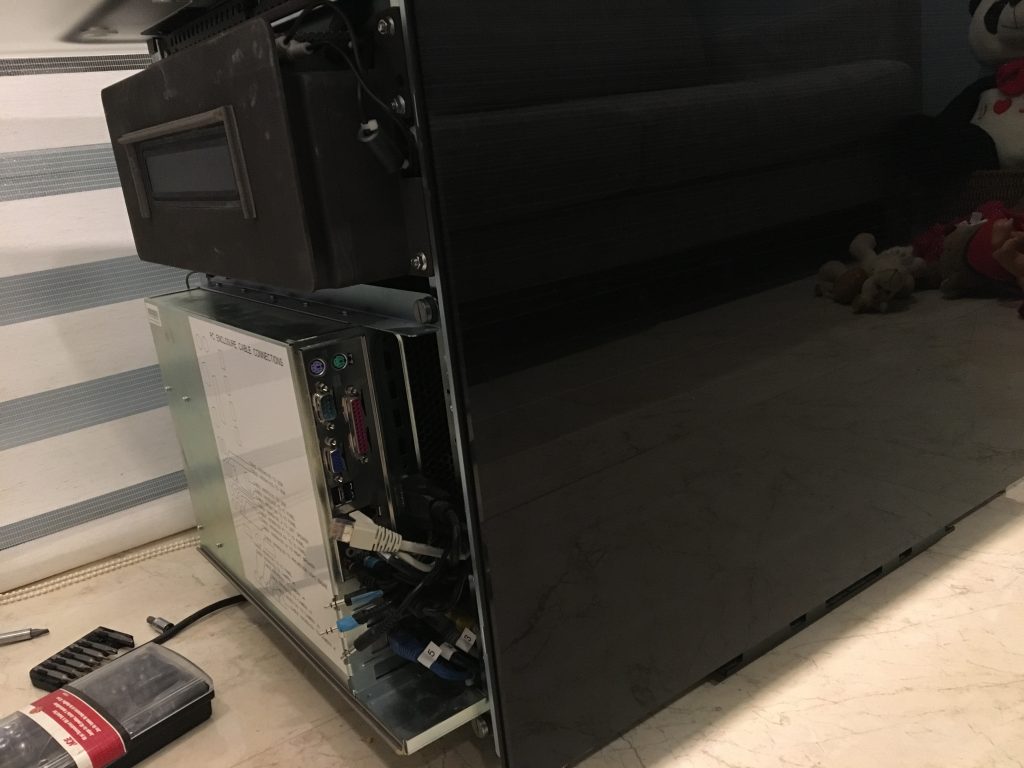
WindowsCentral has already proven the machine can run Windows 10 (https://www.windowscentral.com/windows-10-on-microsoft-surface-coffee-table) but I did not settle for “can run” I wanted to see if it is possible to upgrade the table and get a bit more performance out of it. When I got the table, the HDD was broken and thus needed replacement anyway. First order of business was therefore to open up the device, get into the heart (the computer) and see what it had in store for us and the options for an upgrade. To get to the PC, you need to open up the non-connector side of the device. This can be done by releasing two screws underneath the machine. Push the side-panel downward and remove it. Next you will see a big unit with a lot of connectors that houses the PC itself.
In order to access the cabling system (and later the power-connectors) also remove the side-panels. For this, remove the 4 screws (2 on each side), lift the panel upwards and remove it.
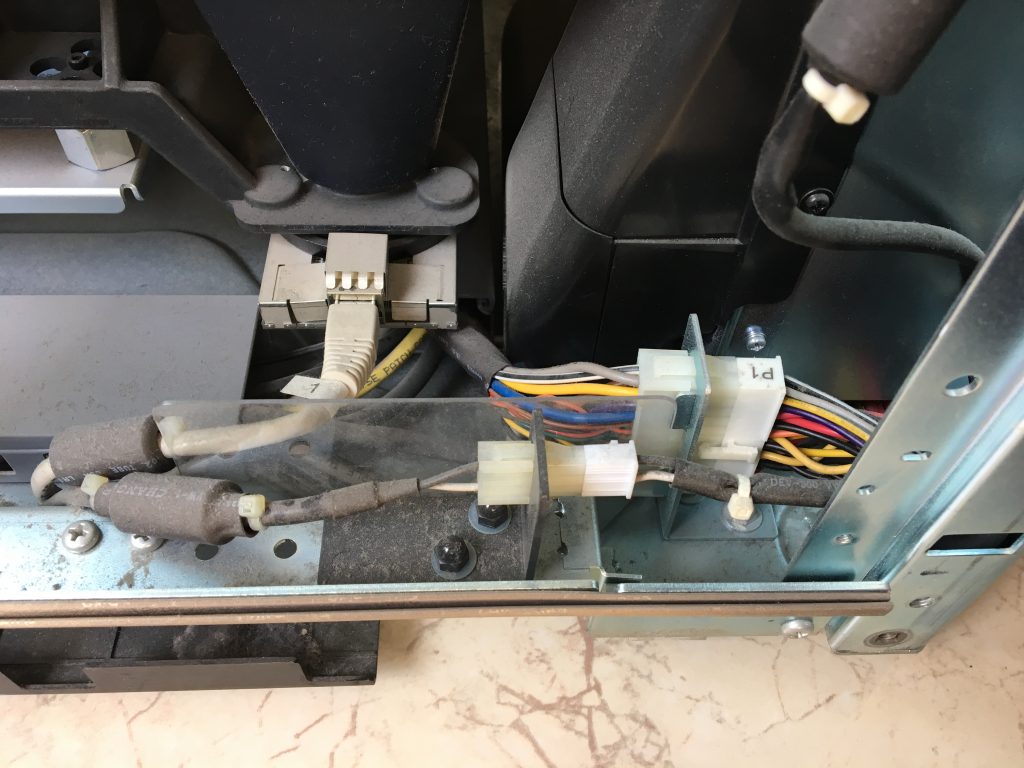
Disconnect the PC cabling (mark the audio connectors to ensure you can put them back in the same place)

Once all the cable are removed, you also need to remove the additional power-connectors behind the left (back) side-panel. This will reveal two power cables. The 2 pin connector is a high-voltage connector for the projector power-supply which is on the other end of the back-panel (against the connector side). The other is a low-power connector that goes to the Surface SMC unit which also is embedded on the connector side.
Remove the earth connector that is connecting the PC unit to the frame and finally remove the 5 screws that hold the PC unit (big ones embedded in rubber rings). Once you have the PC unit out, you can unscrew a million tiny screws and open up the unit:
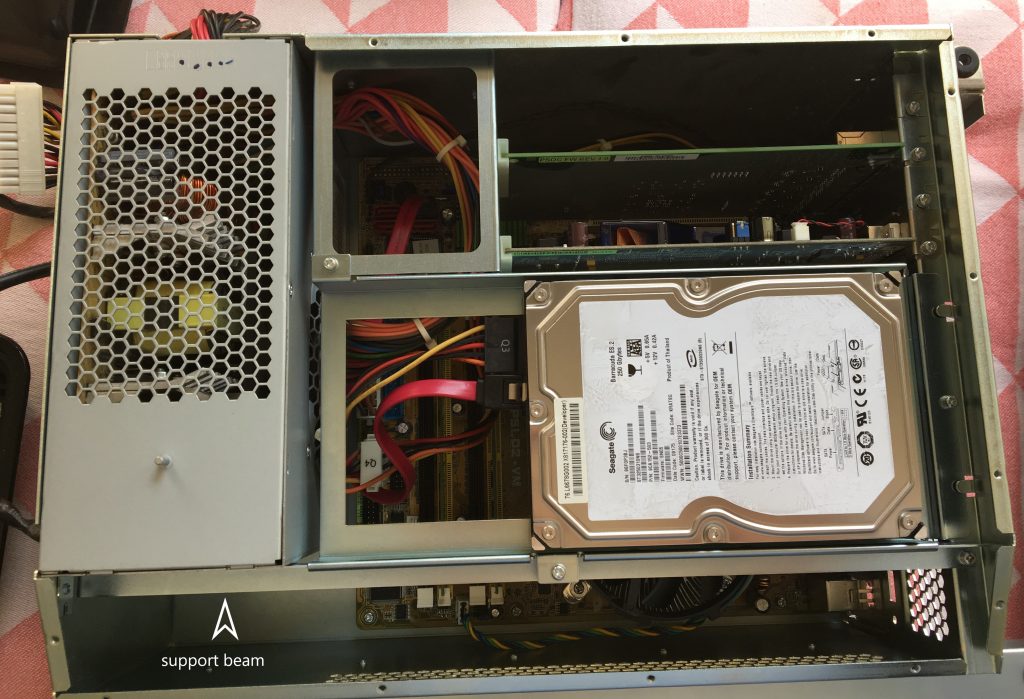
The PC itself is not that exciting. There is an Asus mainboard + CPU + Memory. An ATI X1650 Graphics card and a custom card for the cameras. The software (usually Windows Vista) is installed on the Seagate 250Gb harddrive. In order to access the hardware, undo the 3 screws that hold down the harddrive and remove the entire bracket. For easier access to the CPU/Memory, you can also remove the support beam by removing two additional screws.
So, for me, an SSD was the first logical upgrade. As the mainboard already supports SATA (although version 2 only, not 3), I opted to add the SSD drive as the system drive, and put in a new 250Gb HDD drive for my data storage. The data drive will only hold all installation media, and possibly a backup of the SSD for quick repairs. But, I guess you could put in a 4TB drive with movies or something..
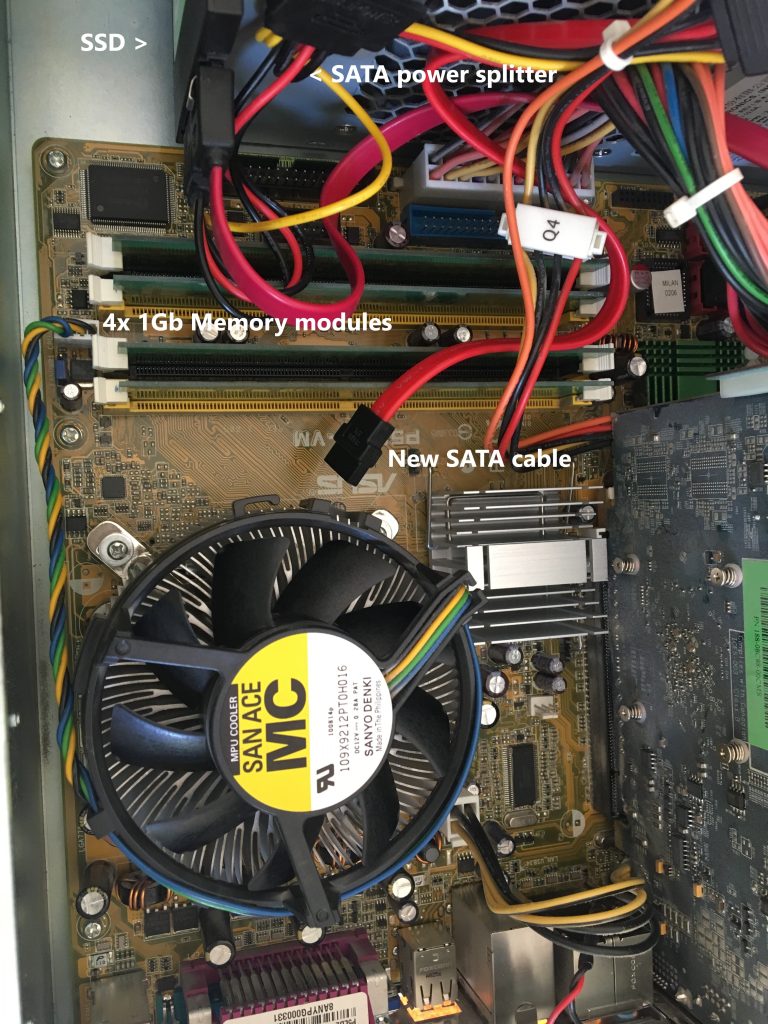
Luckily SSD’s are a lot smaller and I managed to fix it with double-sided tape on the top of the power supply, while my data drive took the location of the old broken Seagate drive. A SATA power splitter was required as the power supply only has 1 SATA and 1 regular power plug. Also, I needed an additional SATA cable. While we there anyway, I decided to also upgrade the memory to 4Gb (1GB 1Rx8 PC2-5300U-555-12 [Hynix HYMP112U64CP8] , x4 modules) and the CPU to an E6420 (as it has 4Mb cache compared to 2Mb) – don’t forget to renew the cooling paste as well.
I managed to set the Q-Fan to silent in the BIOS as well, to ensure the FAN does not constantly run at full power.
And then its putting everything back together again:

The system actually uses a Microsoft branded card to connect to the 5 different cameras. Although it seems like a very large NIC (due to the connectors) it actually uses a Digital Media Processor chip to convert the images from the camera:

The software
Next was the installation. Now, the Surface Table software is created for 32-bit versions only. So, we needed to install Windows 10 (Pro) x86. After the installation the Graphics Card is not recognized automatically, so I found the right (Vista) driver which installs only after setting the installer to Vista compatibility mode but to avoid having any problems with missing files, install .Net Framework 2.0 and 3.5 first from the Windows Features option (start-search Windows Features).
Luckily, Audio, Bluetooth and the Wireless modules are detected automatically by Windows 10, so no need for additional drivers there. Although, prior to making the speakers provide any sound I had to switch the output from headphone to speakers.
Once Windows 10 was fully patched and now with the drivers installed, it was time for the Surface software to be installed. First is the XNA Framework (2.0) – (xnafx20_redist.msi) which was hard to find on the internet as Microsoft has pulled the installer from its download pages. Second is Visual Studio 2008. Given I’m installing the Surface 1.0 SP1 SDK version (not full runtime), VS2008 or VS2010 is required.
Lastly, the SurfaceSDK installer is required. And as per http://blog.rajenki.com/2014/02/modernizing-original-microsoft-surface/
I configured the MSI file to dump the LaunchConditions for Vista and VersionNT
- Installed OR (VersionNT=600 AND ServicePackLevel>=1)
- Installed OR VISTASKU=”Business” OR VISTASKU=”Ultimate” OR VISTASKU=”Enterprise”
Install the Surface SDK and you will have a functioning Surface Table. The installer will install the HydraVision drivers required for the cameras and after the SDK installation you can install the demo applications from C:\Program Files\Microsoft Surface\v1.0\… Calibrate the system (or import the calibration files from Rajenki’s blog) and either run Surface Touch and then Surface or switch to user mode to experience the Surface Table applications on Windows 10. I managed to print out the calibration sheet through a printing shop onto a foam board which saved me some money and time ordering from eBay.

A former colleague of mine managed to write a new touch-application which is way easier to install than the (by Rajenki) proposed Multi-Touch Vista solution. Both solutions allow you to enable touch for the Operating System itself, not just the Surface Launcher. The new solution doesn’t require any configuration nor build and works straight out of the box. The downside is, for now it only supports single touch, but I found that for Windows 10 on this table, that is more than enough for me. So, download the PixelSense2Touch binary https://github.com/Heer-Boaz/PixelSense2Touch.
Next, run the Surface Touch application from the desktop and the PixelSense2Touch after the Touch application has loaded. And you will have single touch working under Windows 10.
The results Windows 10 on the Surface seems to be a lot snappier with the extra memory, SSD and CPU upgrade. I noticed the actual memory usage is around 2.1GB, so that certainly proofs the additional RAM was required. The strange thing is, that although the system has 4GB of RAM installed now, the BIOS only releases 3200MB and reserves the rest (it actually mentions it in the BIOS screen). While illogical, it seems to be related to the ATI graphics card. When switching to an NVIDIA based card in the PCI-Express slot, it released 3800MB. Note that the onboard VGA is disabled. Probably something strange that has to do with the custom BIOS that the mainboard has, but even with 3200MB of RAM available the system seems to be much snappier than with 2GB.
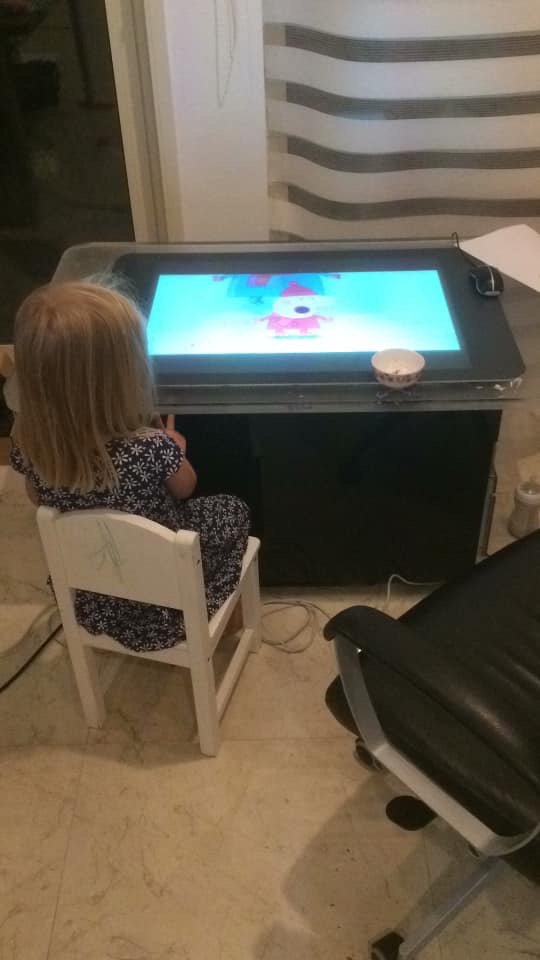
And so, my kids get to have dinner (occasionally) on a small table that can handle spilled food, drinks and dirty fingers and that happens to be able to play Youtube videos, allows them to play games and allows me to have a fully functioning multi-media center.