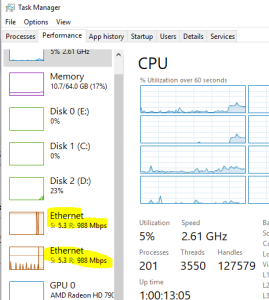
[Update: seems even a Surface Pro 6 with docking station is capable of using SMB multi-channel using 2 NIC’s.. if you use the onboard NIC on the docking station, but also the USB-Ethernet converter in the dock’s USB port, you can actually achieve 2Gbps speeds as well!
And, with the upgrade to a 10Gb switch, it seems SMB Multichannel can also work over 10Gb single interface connections. I upgraded my Mac with a 10Gb Ethernet card, and connected it to the switch.. using the instructions below, I now also have 2Gbps to my Synology over a single cable [/Update]
My Mac Pro machine (still going strong) has two NIC’s onboard. While I initially had the 2nd NIC connected to my DMZ to connect some of my VM’s, I wasn’t using it anymore lately and it was sort of a redundant Ethernet port. Which got me thinking.. what if I can use that 1Gbps also for my regular NAS copying.
Like many, I have my Synology (916+) setup with a BOND (Link Aggregate) and configured my switch to bond these two interfaces together. This allows the Synology to run 2 streams simultaneously and effectively give us 2Gbps throughput for multiple devices. That last part of that sentence is important. While Link Aggregation (or any other bonding) can give you 2Gbps on your NAS device it is only capable of actually reaching that speed if 2 or more devices are connected to it. You can’t get 1 device to run at 2Gbps using this configuration. Also, Windows 10 doesn’t allow you to “team” multiple NIC’s together as this is reserved for the Server SKU’s only. So what to do?
This is where SMB Multichannel comes into play. SMB multichannel allows Windows (10) to use as many adapters as you have to connect to a target to utilize all available bandwidth. There are a few restrictions though: The adapters need to be (fairly) new and the all adapters should be able to connect to the target. And everything has to run SMB 3.0.
While I could find a lot of information on SMB MultiChannel (as how it works and such).. configuring it seems to be a blackhole and thus I decided to give it a try and blog it for you all.
SMB Multichannel
The following is my setup for this test:
Mac Pro
Eth0 = 172.16.5.35 /24
Eth1 = 172.16.5.36 /24
Synology
Eth0 = 172.16.5.10
Eth1 = 172.16.5.19
Now the first thing I did was break the NIC team on the Synology and reconfigured my switch to break the Link Aggregate there as well. Then I enabled SMB3 in the Synology as for some bizarre reason this is not enabled by default:
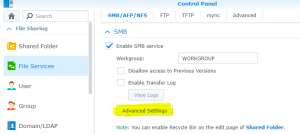
Login to your Synology and go to the Control Panel. There select File Services under File Sharing. Under SMB, select Advanced Settings:
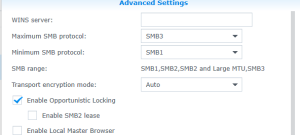
And once in there, set the maximum SMB protocol to SMB3
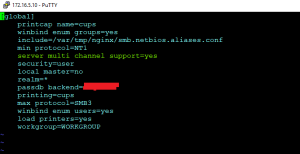
While you may think this actually enables it, you are wrong (at least for my software version, perhaps they add it automatically in later versions). Synology by default disables this feature and we have to enable it in the SMB.conf file which is under /etc/samba.
So, fire-up Putty and login to the Synology using SSH. Go to /etc/samba and sudo vi smb.conf
Push the INSERT key on your keyboard and go down to the last line. In there type:
server multi channel support =yes
Type <ESC> : wq <enter>
Finally, reboot the device.
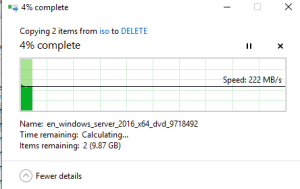
And that’s all there is to it. If you connect to your NAS now, and start a file-copy it should give you more speed. Now in my first attempts, it was actually slower, but the 2nd file copy was better and now it seems like it sorted itself out.
Checking if MultiChannel is actually being used can be done using PowerShell. When or after copying a file, in PowerShell, type Get-SMBMultiChannelConnection
And as you can see from the below screenshot, I’m actually using all capacity when copying files..
More proof comes from the Task Manager Performance Tab for the Network cards:
And that’s it.. don’t make it over-complicated, use simple technologies and run at twice the speed

