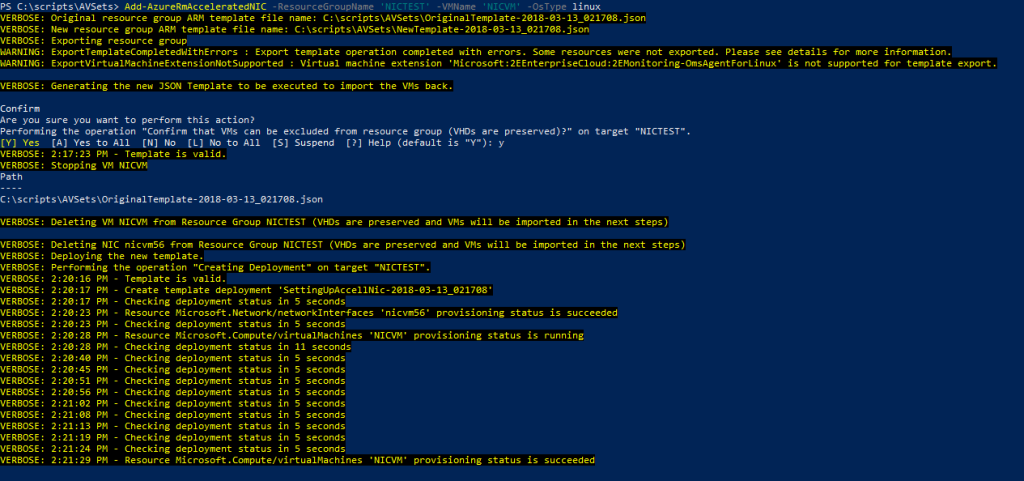
Microsoft Azure has the option to enable Accelerated Networking on VM’s. More information on the feature can be found here but this post is not to tell you about what good it does nor how it works.. no, this post is to introduce a new script that will enable/disable the function for you!
update: it’s now possible to enable/disable this via PowerShell or CLI. Check out the latest post on this.
The script works similar to the AvailabilitySet script made by Paulo Marques which uses the possibility of exporting the ARM template of the resource group and then prepare that template for redeployment with the correct values (in our case the enableAcceleratedNetworking=’True’ value)
During the enable/disabling of the feature, the VM itself and ALL related NIC’s are deleted and re-created. It is advised to have a backup of your VM available. We do not hold any responsibility for lost data/VM’s.
Beware that if you use a dynamic Public IP address for the VM, the public IP address will change as the VM is redeployed
Note that the VM size must support the Accelerated Networking feature.. the script validates on this based on the “common” sizes used. If you use a special VM size (H/N series) you might need to alter the script a little bit..
Usage
- Download / Unzip/ Import the modules. Open PowerShell and login to Azure using Add-AzureRMAccount.
- Import-Module .\AzureRm.AcceleratedNIC.CoreHelper.psm1
- Import-Module .\AzureRm.AcceleratedNIC.Management.psd1
- Get the OS information from the VM (it will be required)
- Run the following command to ADD Accelerated Networking to a VM:
- Add-AzureRmAcceleratedNIC -ResourceGroupName ‘NICTEST’ -VMName ‘NICVM’ -OsType linux
- Run the following command to REMOVE Accelerated Networking from a VM:
- Remove-AzureRmAcceleratedNIC -ResourceGroupName ‘NICTEST’ -VMName ‘NICVM’ -OsType linux

and that’s it.. using JSON deployment, we can not re-deploy a VM quickly and enable/disable the Accelerated Networking option!
Problems?
I recently got an email from one of my readers, that the above script did not fully work for him. We checked it out, and it seems he was trying to run the script against a marketplace deployed 3rd party installation. When collecting the existing configuration for the VM, this included a lot of vendor specific parameters. The amount of parameters where simply too much for the deployment and it failed. If your deployments fails, do not get (too) scared. The JSON template is the master, and you still retain the VM disk at all times, so it can be recreated.

Open the JSON template file created (you will see in the output where it was created – but it’s called: NewTemplate-<year>-<month>-<day>_<time>.json, eg; NewTemplate-2018-112-21_115401.json)
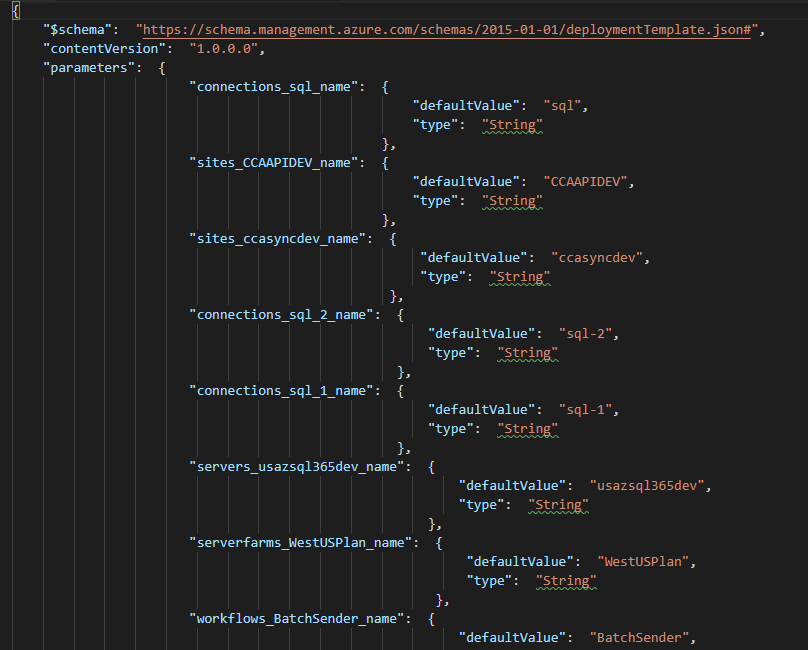
Once you have opened the newTemplate file, in this case I noticed a lot of parameters with default values. Given many of these parameters where not required anymore (they are only required on initial deployment to set SQL options, and control scripts for deployment), simply removing them was enough for this deployment to succeed.

In this case what I did was search the rest of the template file to see if these parameters where still being used. They where not. So it was easy to delete them all and have a cleaner template file for deployment:

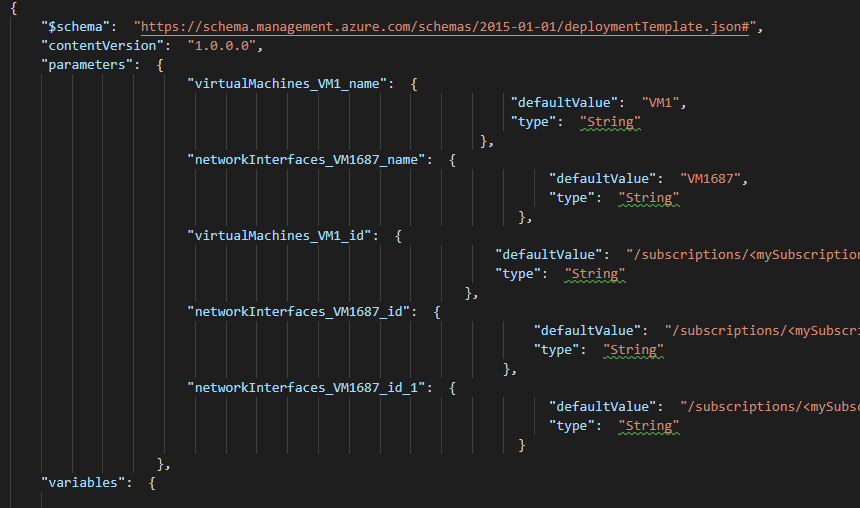
The new-newTemplate file only included the parameters actually used in the deployment template. Usually these are limited to just the VMName, VMid, NicName, NicID, and sometimes the NicId two or tree times depending on NSG usage. Just search for the parameter name, and if not used in the variables, or resources delete it. Make sure the last entry of the parameters doesn’t include a }, but just } to close the block.
Once you have the new parameter file, you can test the deployment using the following commands:

Or perform the actual deployment using:

where $newTemplateFile is obviously the path to the file itself: $newTemplateFile=’c:\scripts\newTemplate-2019-02-25_113547.json’
Please feel free to reach out if there is any problems.. while comments are disabled, the “About” page shows how to get in touch
