The Azure AD Application Proxy is a new feature available in Azure WAAD Premium. It allows administrators to securely publish internal websites using Azure’s technology. By using this, it will allow customers to make use of enterprise class hardware in their reverse proxy solutions protecting against DDOS attacks and many more other things. In this post we will look at a simple setup on how this would work.
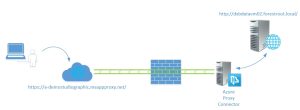
In the above picture the simplified solution is shown. On the right side we have the internal web server with the internal URL. A second server is the Azure Proxy connector. This server is basically a Windows 2012R2 server with a single application (the connector) running on it. The connector creates an outbound connection to your Azure subscription and awaits further instructions. On Azure a new Proxy Application is created and this application will have the external and internal URL configured, along with the authentication option.
When the user opens the external URL, the request is forwarded to the connector server which handles the final traffic to the web server. As the proxy connector server only creates an outbound connection, there is no need to publish the webserver directly on the firewall.
So how do we set this up?
- Create an internal web server
- Create a Proxy Connector Server
- Enable WAAD Premium
- Create the application
- Install proxy connector
Create an internal web server
So the AADAP within Azure today can perform authentication on behalf of your website. This authentication is based on federation and the token can be forwarded to the internal server. If the internal website is also configured for federated authentication, SSO is achieved. Hopefully they will add other authentication mechanisms too in the future. In my case I just installed the basic IIS webpage and nothing more.
Create a Proxy Connector Server
The proxy connector server is just a domain member server with the proxy application loaded. This application is available as a download once we configure the application and does not require any further configuration. Note however that the server must be able to reach the Azure datacenter on the following ports:
| Port Number | Description |
| 20200 – 20204 | To enable long poll requests originated from the Connector towards the Azure service |
| 10100 – 10104 | To enable LOB HTTP responses sent back to the proxy |
| 8080 | To enable the Connector bootstrap sequence |
| 9090 | To enable Connector Registration |
(ports might change in the future)
Enable WAAD premium
In order to actually use the feature, enable WAAD Premium in your portal. You can activate and try WAAD Premium for 90 days for free!..
After that, you need to actually license a user for WAAD premium in order to view the options. For this, go to Licenses and select the user you want to activate it on. Then select Assign on the bottom of the page.
Create the application
Now when you go to Applications on the Azure WAAD, you can create a new application and now there will be three options:
Choose the third option: publish an application that will be accessible from outside your network and give the application a name. NOTE That this name will be used within the external URL!
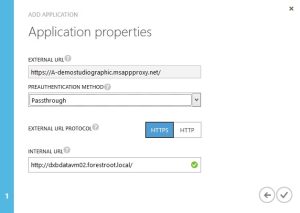
The external name is automatically generated. It uses the name provided for the connection, your tenant name and the fixed msappproxy.net. The authentication method can either be passthrough or Azure Active Directory. My tenant in this case is already configured with Federated Authentication using dirSync from my local AD. So I can choose Azure Active Directory. If you are not federated but do have all your users in WAAD, you can choose this option too. If your website is anonymous or uses NTLM/Basic authentication, you must select Passthrough.
The internal URL provided is the internal URL for the web service. After the configuration you can download the connector and install it on your Proxy Connector server (note that this does not have to be the actual web server!)
Finally we need to assign users who are able to actually use this web application. If you selected pass-through, this option will not be visible.
Go to the users and groups tab, select the users(or groups) you want to enable and click Enable
It will take a few minutes for the connector to be configured. But after that, open a new browser window (or logoff) and browse to the URL of the application.
You will initially see a generic Microsoft Logon URL:
If you don’t have a federated domain you can just login and you will be redirected to your application. If you configured pass-through you will go directly to the application. But with a federated domains you will be redirected to the on-premises ADFS server as soon as you enter the username@domain.com:
(The on-premises federation server.. yes with altered pictures)
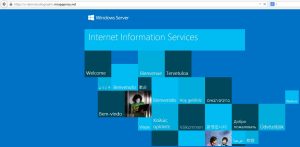
And after providing your credentials, the website will be visible:
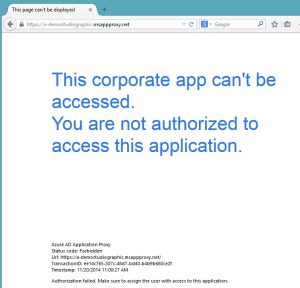
If you do not wait long enough, it might be that the application is not yet ready.. and if you do not have access, you will see the following message:


