In a previous post we looked at the ability of creating a Site-2-Site connection from Checkpoint to Azure using a Dynamic Gateway. In this post, we look at client-dialup (VPN) into the Azure network and establish routing between all the sites involved.
As it happens, the Dynamic gateway also supports point-2-site VPN’s allowing your client to “dial-in” to your Azure Network. In order to do this, in the Azure portal we need to select the multipoint-to-site connection and provide an address range for it to assign to clients dialing in.
So in this case we added the 10.1.3.0/24 range for clients to use.
Client Certificates Setup
Next up is configuring the network to actually allow clients to connect. Now this has been described on the following URL: http://msdn.microsoft.com/en-us/library/azure/dn133792.aspx
But it comes down to creating certificates to be uploaded to the Azure Network and a private copy of that certificate to be loaded in your client, first starting with the RootCertificate:
makecert -sky exchange -r -n “CN=RootCertificateName” -pe -a sha1 -len 2048 -ss My “RootCertificateName.cer”
Then the client certificate
makecert.exe -n “CN=ClientCertificateName” -pe -sky exchange -m 96 -ss My -in “RootCertificateName” -is my -a sha1
Install the root certificate in the Azure Portal under the network tab “Certificates”
The Root Certificate and the Client certificate are already installed on your client, and if you want to connect with more clients, export these (The client one as PFX with password) and import in the other clients.
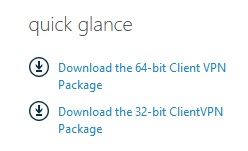
When this is done, you will see a download link on the Network Dashboard that allows you to download and install the client.
After installing the client you can connect to Azure using the Network sidepanel on Windows 8.. simply click Connect and you are connected.
If you get any errors from the client connector, check your certificates….
Client Side Routing
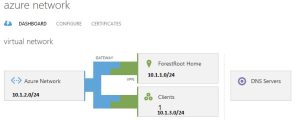
So now for the routing.. we have the following setup:
The dynamic gateway already takes care of everything within Azure, but the client by default only receives the Azure Network address space. So we need to configure a static address in the VPN client to let it also know the route for the Forestroot Home datacenter.
In order to do this, we can check the following file:
%APPDATA%\Microsoft\Network\Connections\Cm\[GUID]\routes.txt
In there we need the following lines:
ADD 10.1.1.0 MASK 255.255.0.0 default METRIC default IF default
ADD 10.1.2.0 MASK 255.255.0.0 default METRIC default IF default
And that leaves us with only the task of configuring the CheckPoint firewall to route more than a single subnet through the VPN.
CheckPoint Firewall MultiSubnet VPN
So we start in SmartDashboard with Network Objects. Add a new Network Object for the Dial-up Address range: 10.1.3.0/24
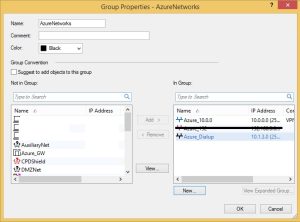
Next, we need to create a group, with in there the two Azure Address Ranges:
Next we need to reconfigure the Azure Gateway as defined in our CheckPoint to use this group instead of the previously configured single network. Open the object browser and then the properties of the AzureGW. Go to the topology tab and select the Azure_Networks group created earlier.
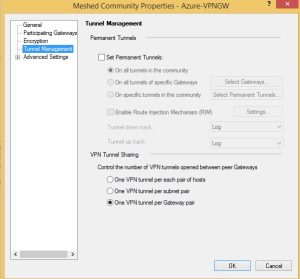
Next, open the VPN community settings and browse to Tunnel Management. As we are now pushing multiple subnets through the same gateway, we need to set this option to One VPN Tunnel per Gateway Pair
Finally on our firewall rules page, we need to add the firewall rule that actually allows the traffic to flow from our Dial-Up network to the Datacenter. You can do this with the Network Groups, or the individual networks themselves.
Reconnect the VPN’s and you will have a fully routed network


